
Making jewellery from polymer clay and artists’ powdered pigments

Using Artists' Powdered Pigments to Colour Polymer Clay
This is my very first blog post on my website! It's been a very long time coming - somewhere in the vast internet world my first attempt at a website/blog still exists on an old blogspot site. I guess it is still out there somewhere. Over a decade later, I'm writing my first 'journal' post so I thought I'd write about using pigments to create my own colours with polymer clay. I think this will probably turn into a series of posts as there's a lot to say but, for my first ever post, I'll keep it simple, talk a bit about the tools I use and (hopefully) not ramble on too much. Which I am very capable of!
For anyone who knows me or my jewellery, they will know that I have a complete obsession with colour. I'm spellbound by it and I have spent many years mixing colours and clays to make my own beautiful colours. I like my colours to be slightly softer in tone and I like them matt and, since the pandemic, I have been using only artists' powdered pigments with a porcelain white polymer clay to create all of my beads and earrings. It's time consuming and there are many different processes to making my own colours but, I love every stage and the end results are so satisfying. So, without further waffling, here's a little bit of info about how I use artists' powdered pigments with polymer clay to create my own range of colours.
Inspiration for colour mixing with pigments
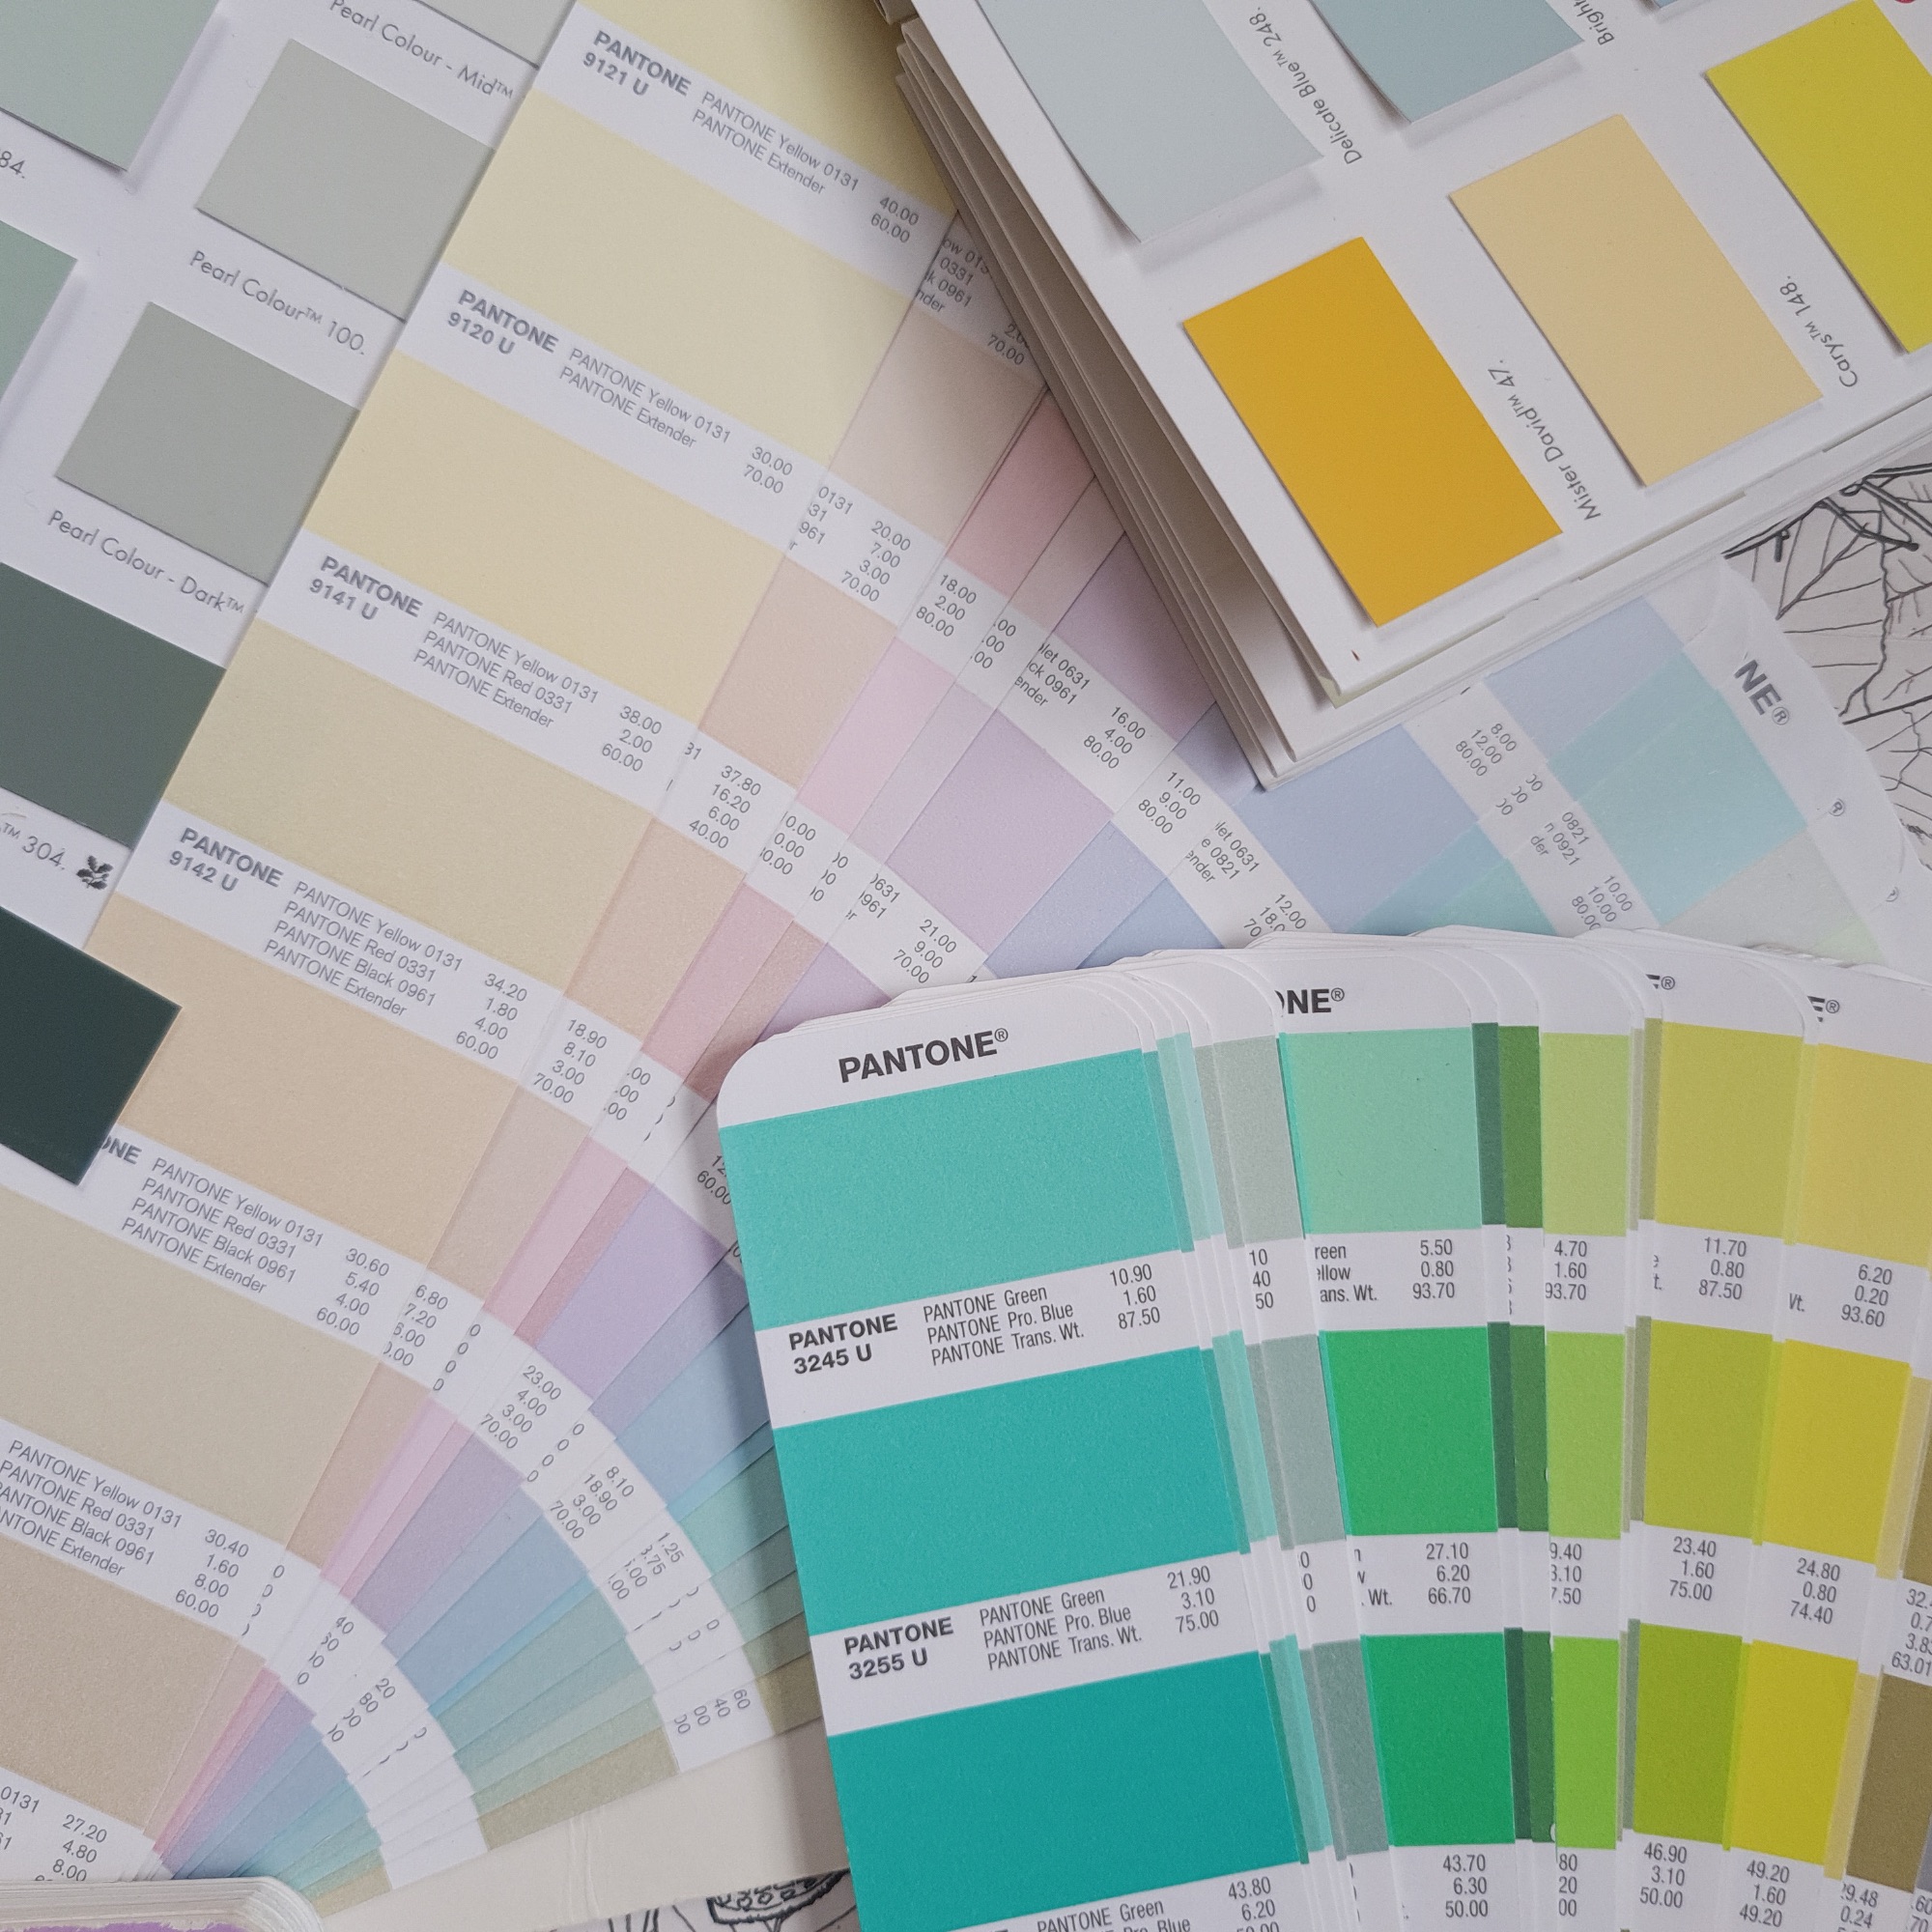
I can find inspiration for colours just about anywhere - nature is my biggest muse and I can waste hours gawping at the colour of the sea or sky or lichen! But I also have quite an thing for paint swatches and Pantone colour books (always uncoated!) and I use these to colour match and use as a reference for commissions and orders. Farrow and Ball, Little Green and Fired Earth are my current favourites as their paint colours are matt and more subdued. I don't want my colours to be too vivid or too intense so I often add a tiny touch of grey (ochre gris) to some of the brighter pigments to tone them down.
Tools and equipment for mixing pigments into polymer clay
There are a few tools and pieces of equipment that I couldn't live without when it comes to mixing artists' powdered pigments into polymer clay and creating my own beads and earrings. I'll list a few here and I'll write some further posts about them so I can explain how I use them in more detail.
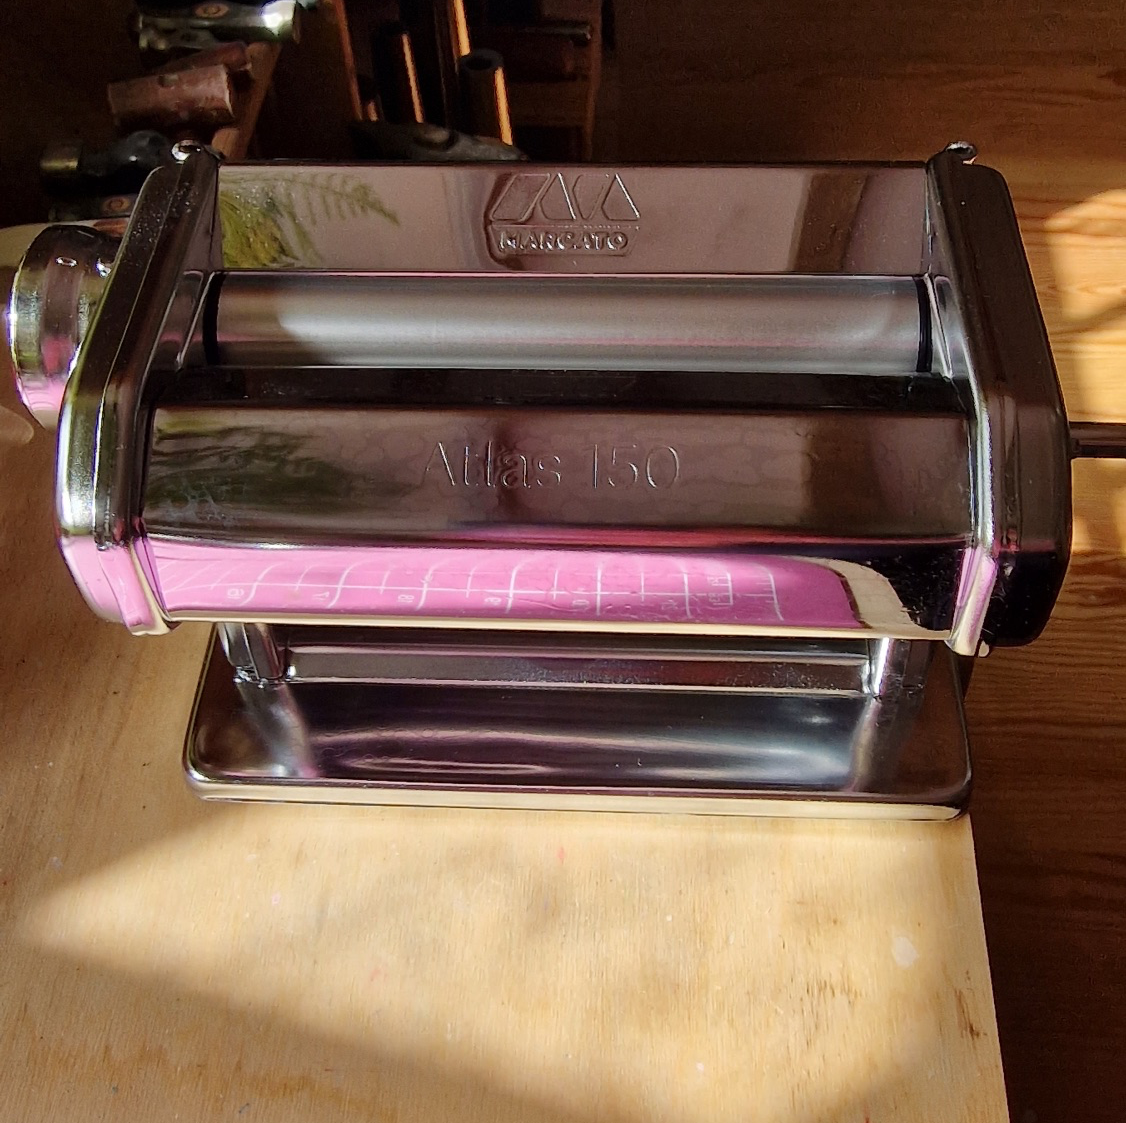
Pasta Roller - for me, a pasta roller is an indispensable piece of kit. I am currently using a Marcato Atlas 150 and I think it is brilliant. Polymer clay needs to be conditioned before using - this means you need to knead it like dough to soften it up and make it more pliable before you mix pigments into it or shape it into beads. Unconditioned clay can be brittle and impossible to work with. This can be tough on your hands and wrists and I have often bruised the palms of my hands after several hours of clay conditioning! It's hard work! I use the pasta roller on various thickness settings to help condition the clay and to help blend the pigments into the clay. I also use it to create sheets of polymer clay that are an even, smooth thickness. I would advise getting a good quality pasta roller as it should last you years and make life a little easier when working with polymer clay. I started with a Judge pasta roller which I got in the local kitchen shop in the sale and it lasted for about ten years before the knob fell off and one of the rollers came off! You can get clay rollers from Sculpey and Fimo but I've never used one.
Baking Sheets and a Good Acrylic Roller - I use non stick baking sheets - mine are made by MasterClass and are heavier so they withstand multiple goes in the oven and don't buckle like some of the thinner sheets. I use them to roll out my clay, mix my pigments and I use them in my mini oven. A good quality acrylic roller is also essential - mine is made by Sculpey and it has lasted me for years. I use it to condition polymer clay, to roll pigments between sheets of polymer clay and it's invaluable.
Tissue Blades, Scalpel and Tools - you can get all sorts of tools, cutters and blades for using with polymer clay and I've got a fair few that I've collected over the years. The essential tools for mixing pigments into polymer clay are minimal for me and I use a scalpel (sometimes a pestle and mortar) to chop up some of the lumpier pigments and I use a small polymer clay tool that is shaped a bit like a small flat rectangular spoon - I have no idea what it's called - there's a photo of it below with the pigments and I use it to measure out tiny amounts of pigment to add to my clay. I won't go it to details on this post about tools, cutters and ovens so, for now, I'll just stick to the items I use to mix pigments into polymer clay.
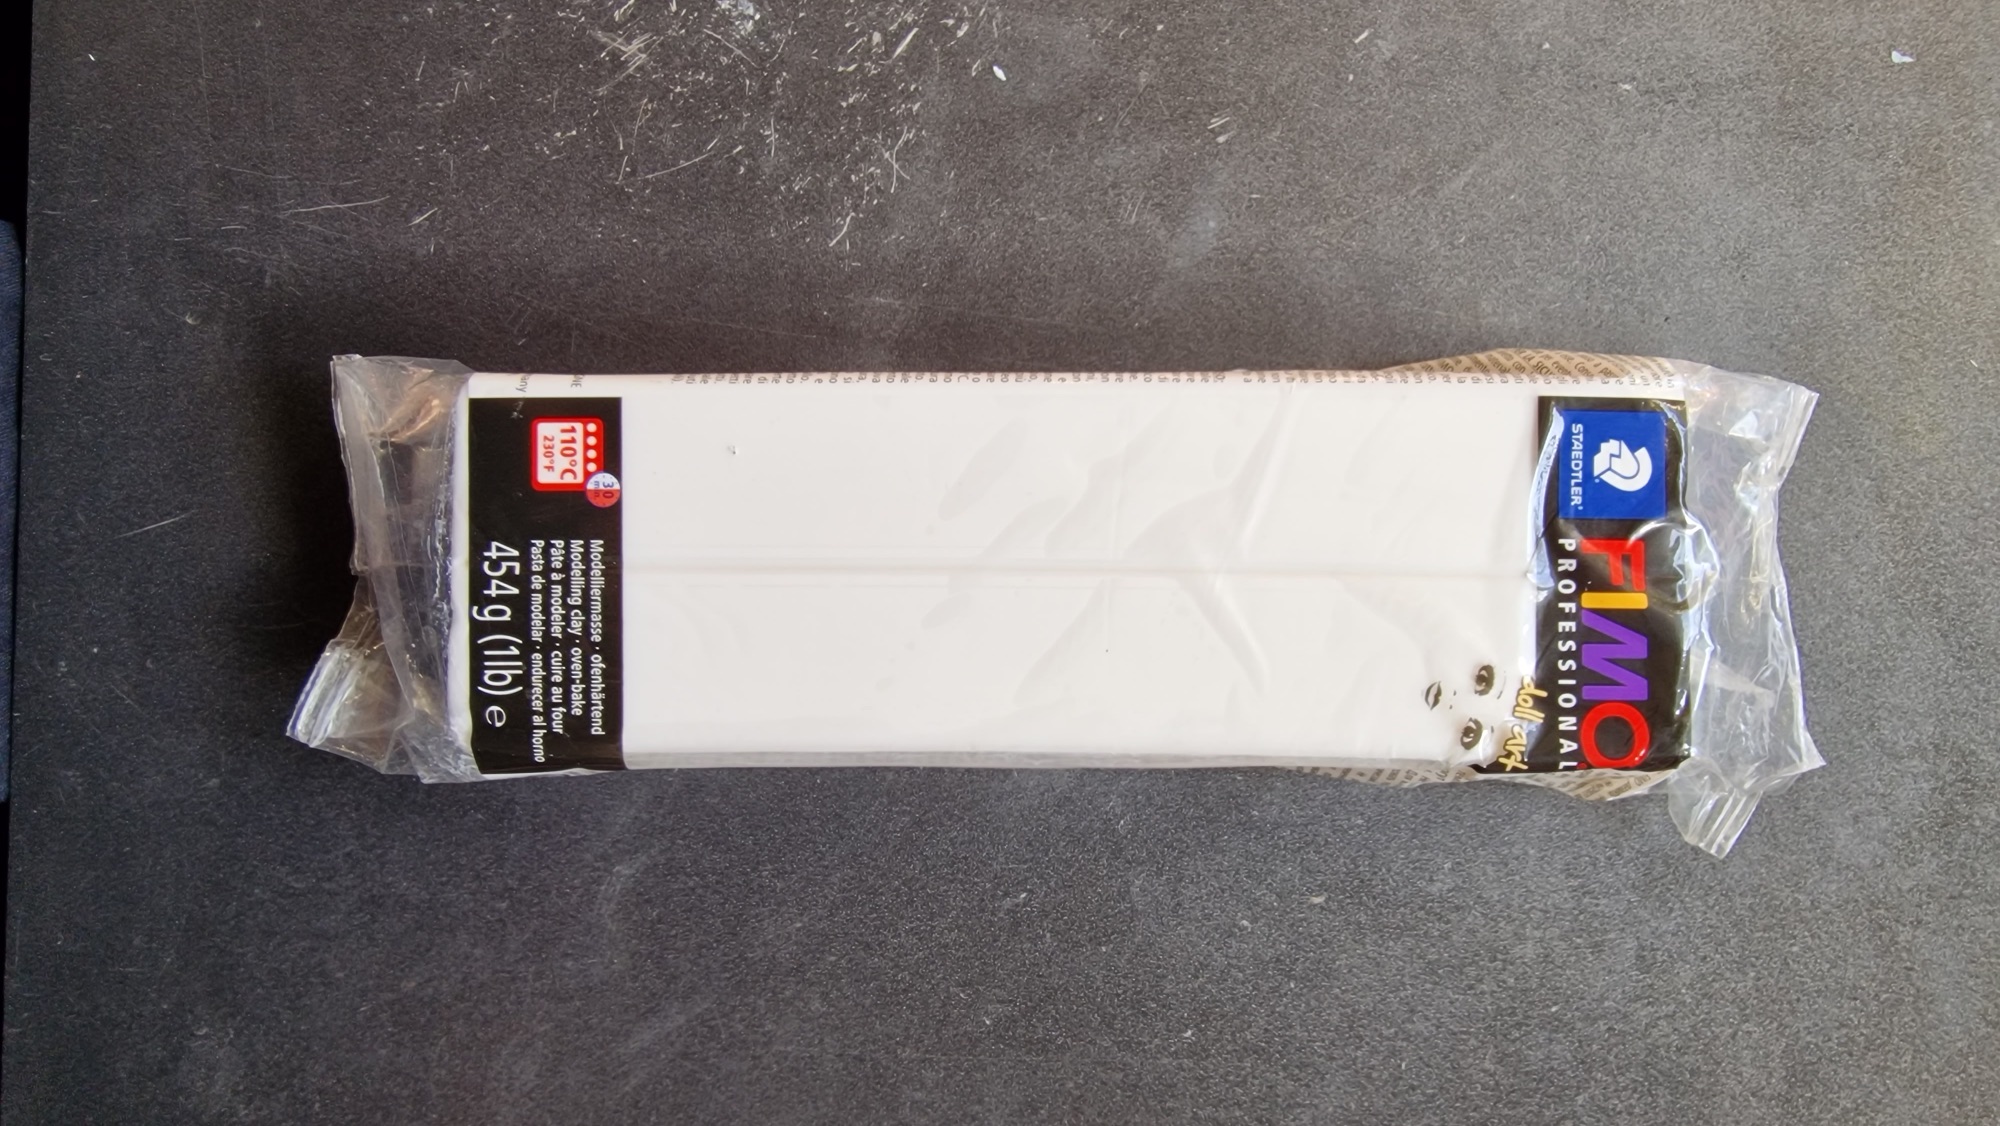
Polymer Clay - I've used so many different brands of polymer clay over the years. At the moment, I use Fimo Professional Porcelain polymer clay in large 1lb blocks or Cernit Opaline White for all of my polymer clay work. I particularly like the finish I get with the Fimo Porcelain clay. I'm less keen on the translucent clays as I like my colours to be quite dense and very matt. If you're thinking of trying pigments; I'd certainly recommend giving these two clays a try.
Pigments - I have a large ever growing collection of powdered artists' pigments. They last a life time and a little goes a long way. I have many different brands of artists' pigments including Cornelissen, Sennelier and Jacksons. Always check the toxicity levels before buying - I always choose the lowest toxicity which means they are the safest to work with. Some pigments are hazardous and would require a respirator to work with them and I don't use these. The exception has been natural indigo for which I need to don the face respirator. I also choose not to use any pigments that might contain any animal products. The three suppliers I have listed all provide detailed information about what the pigments are made from and if there are any safety requirements.
Mixing pigments into polymer clay
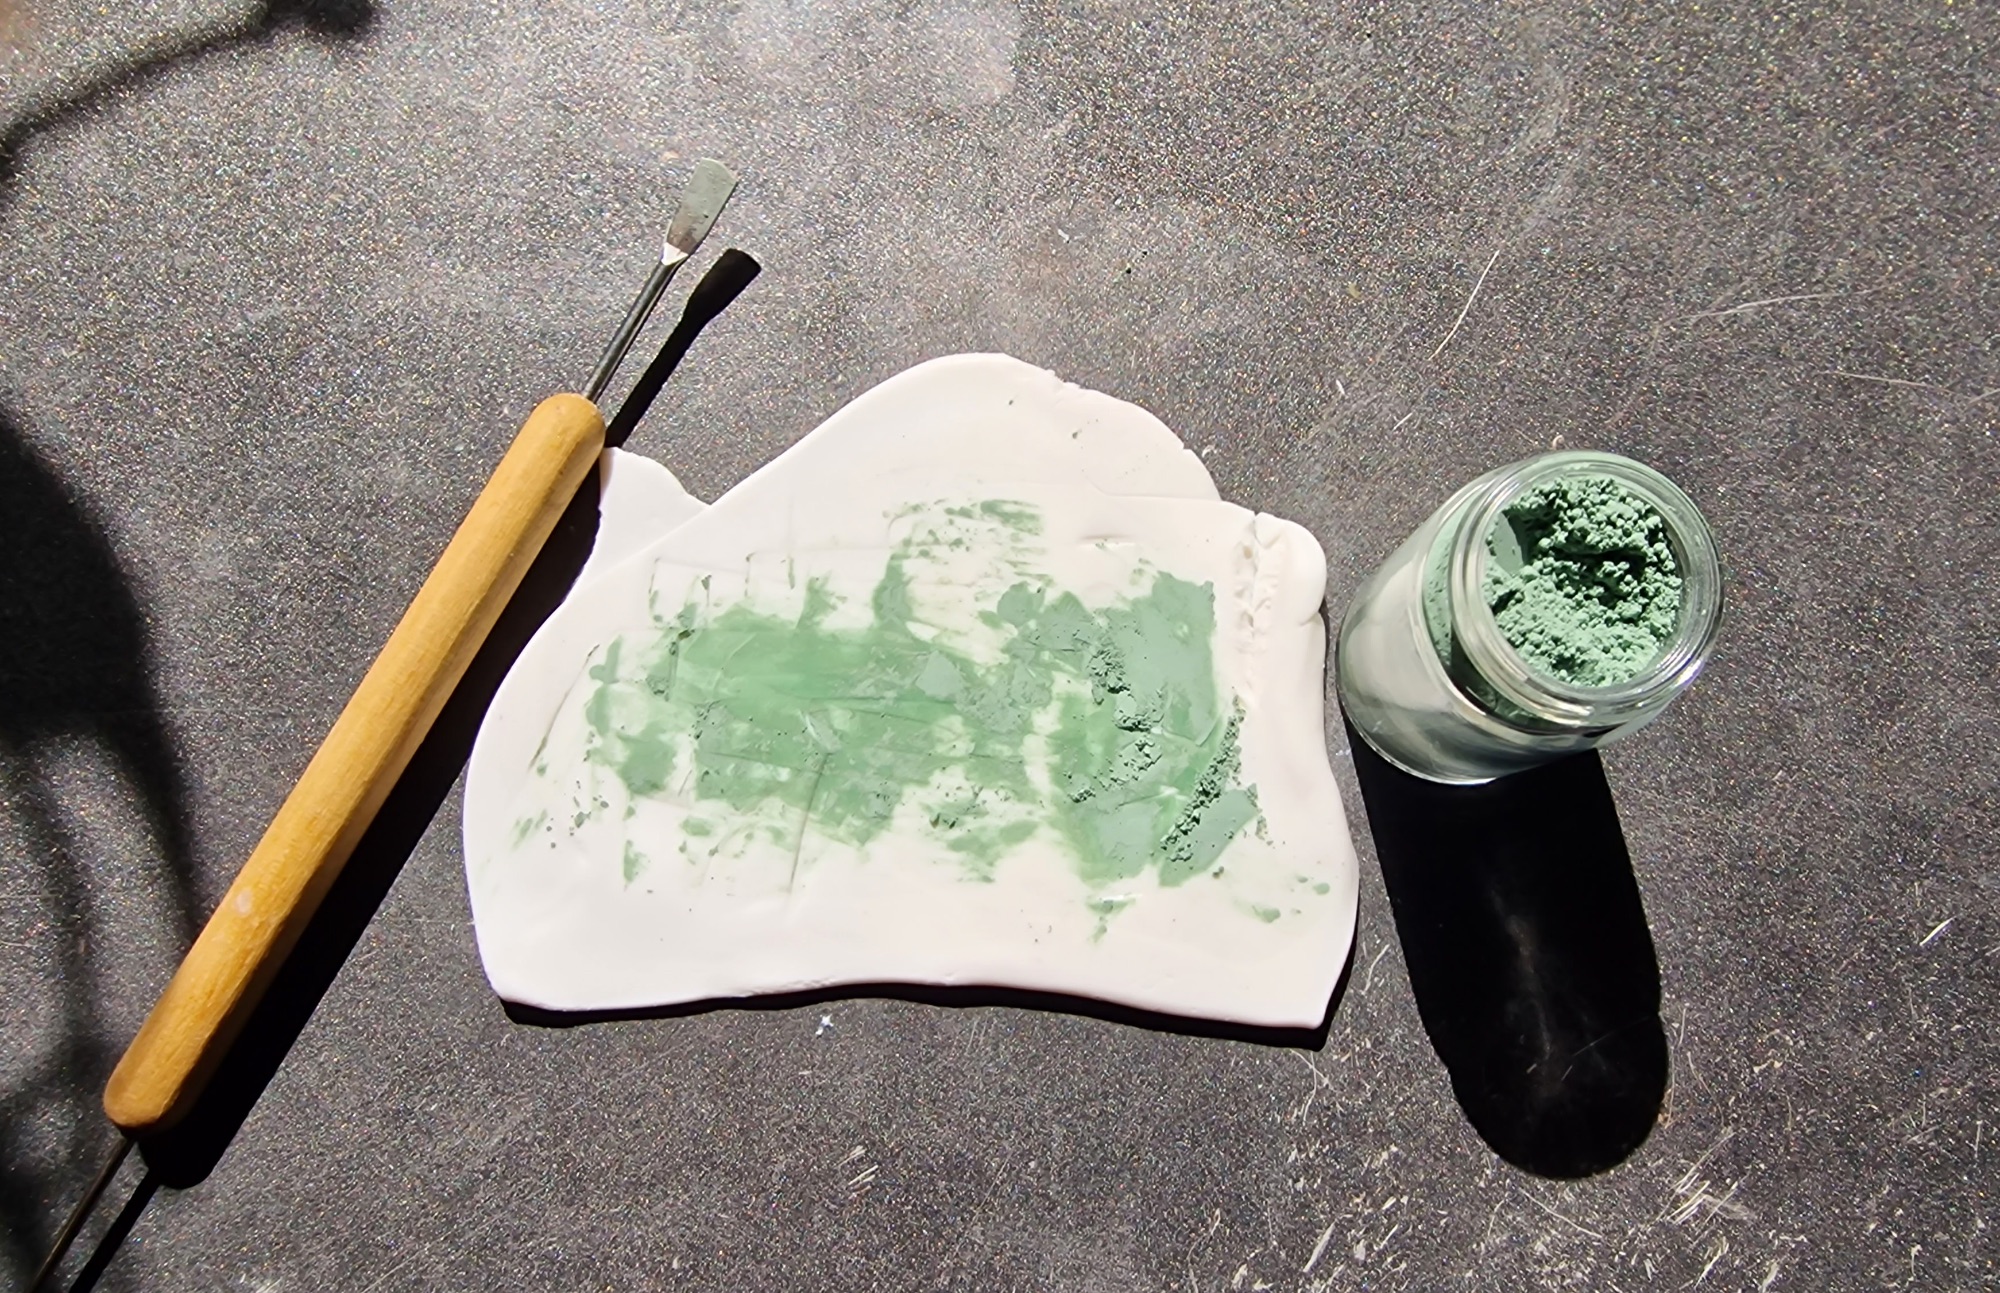
This is time consuming and labour intensive but it's defintely worth the work. I make all my colours by eye, I don't weigh out the pigments (they are all different weights and consistencies) but I use the same tool to gradually add very small amounts of pigment to conditioned clay and I keep photos and notes about how different pigments behave and the colour results. I also make colour swatches to keep as a reference guide.
As a general rule, you will need more of a translucent pigment than an opaque pigment to colour the clays. Tiny amounts of primary colours like cadmium yellow, cadmium red and ultramarine blue go a very long way but a translucent pigment such as green earth will need at least three times the amount of pigment to create a comparable colour to the pigment itself.
I mix my pigments by adding each pigment separately to the clay for example, to create an orange, I will first fully mix cadmium yellow into the clay before I add a tiny amount of cadmium red to the now yellow clay. I will use the pasta roller to completely mix the colours into the clay to create a smooth, consistently coloured sheet of clay. I then roll my clay sheet into a ball ready to turn into beads.
Colours will change after firing!
This is probably the biggest difference between using pigments to create your own polymer clay colours and using pre-coloured polymer clay and it takes some getting used to - hence keeping notes, photos and making colour swatches! Polymer clay coloured with artists's powdered pigments will change colour after firing! It will change by several shades and will both darken and intensify after it has been baked.
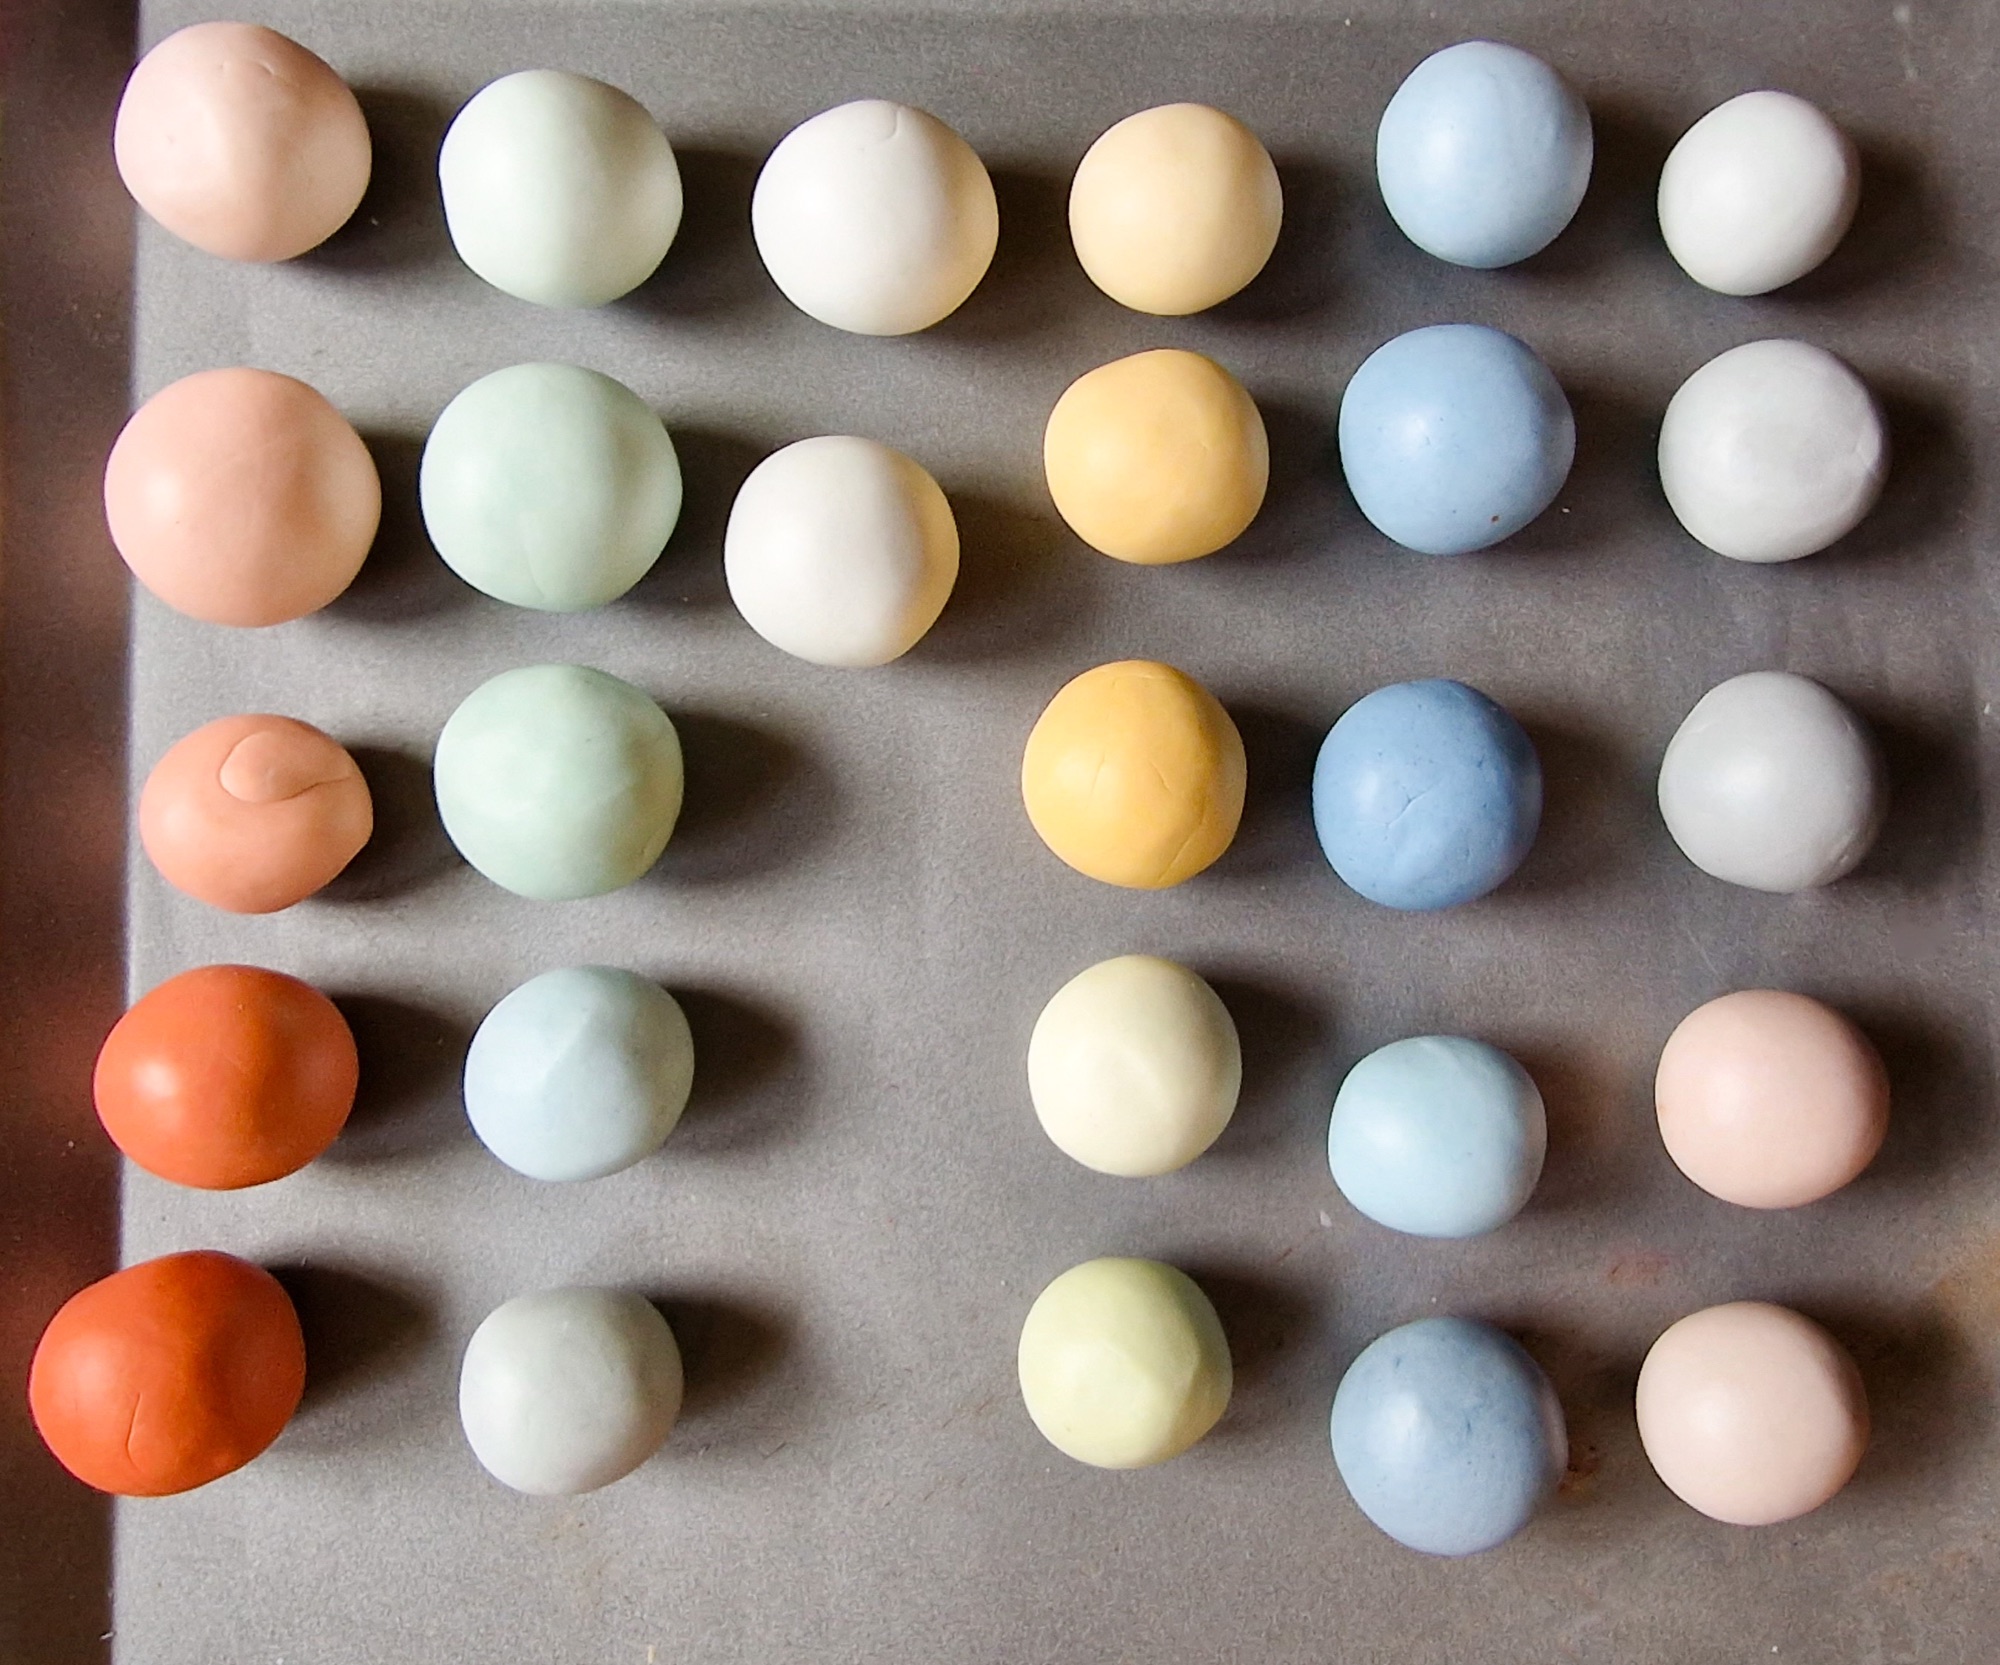
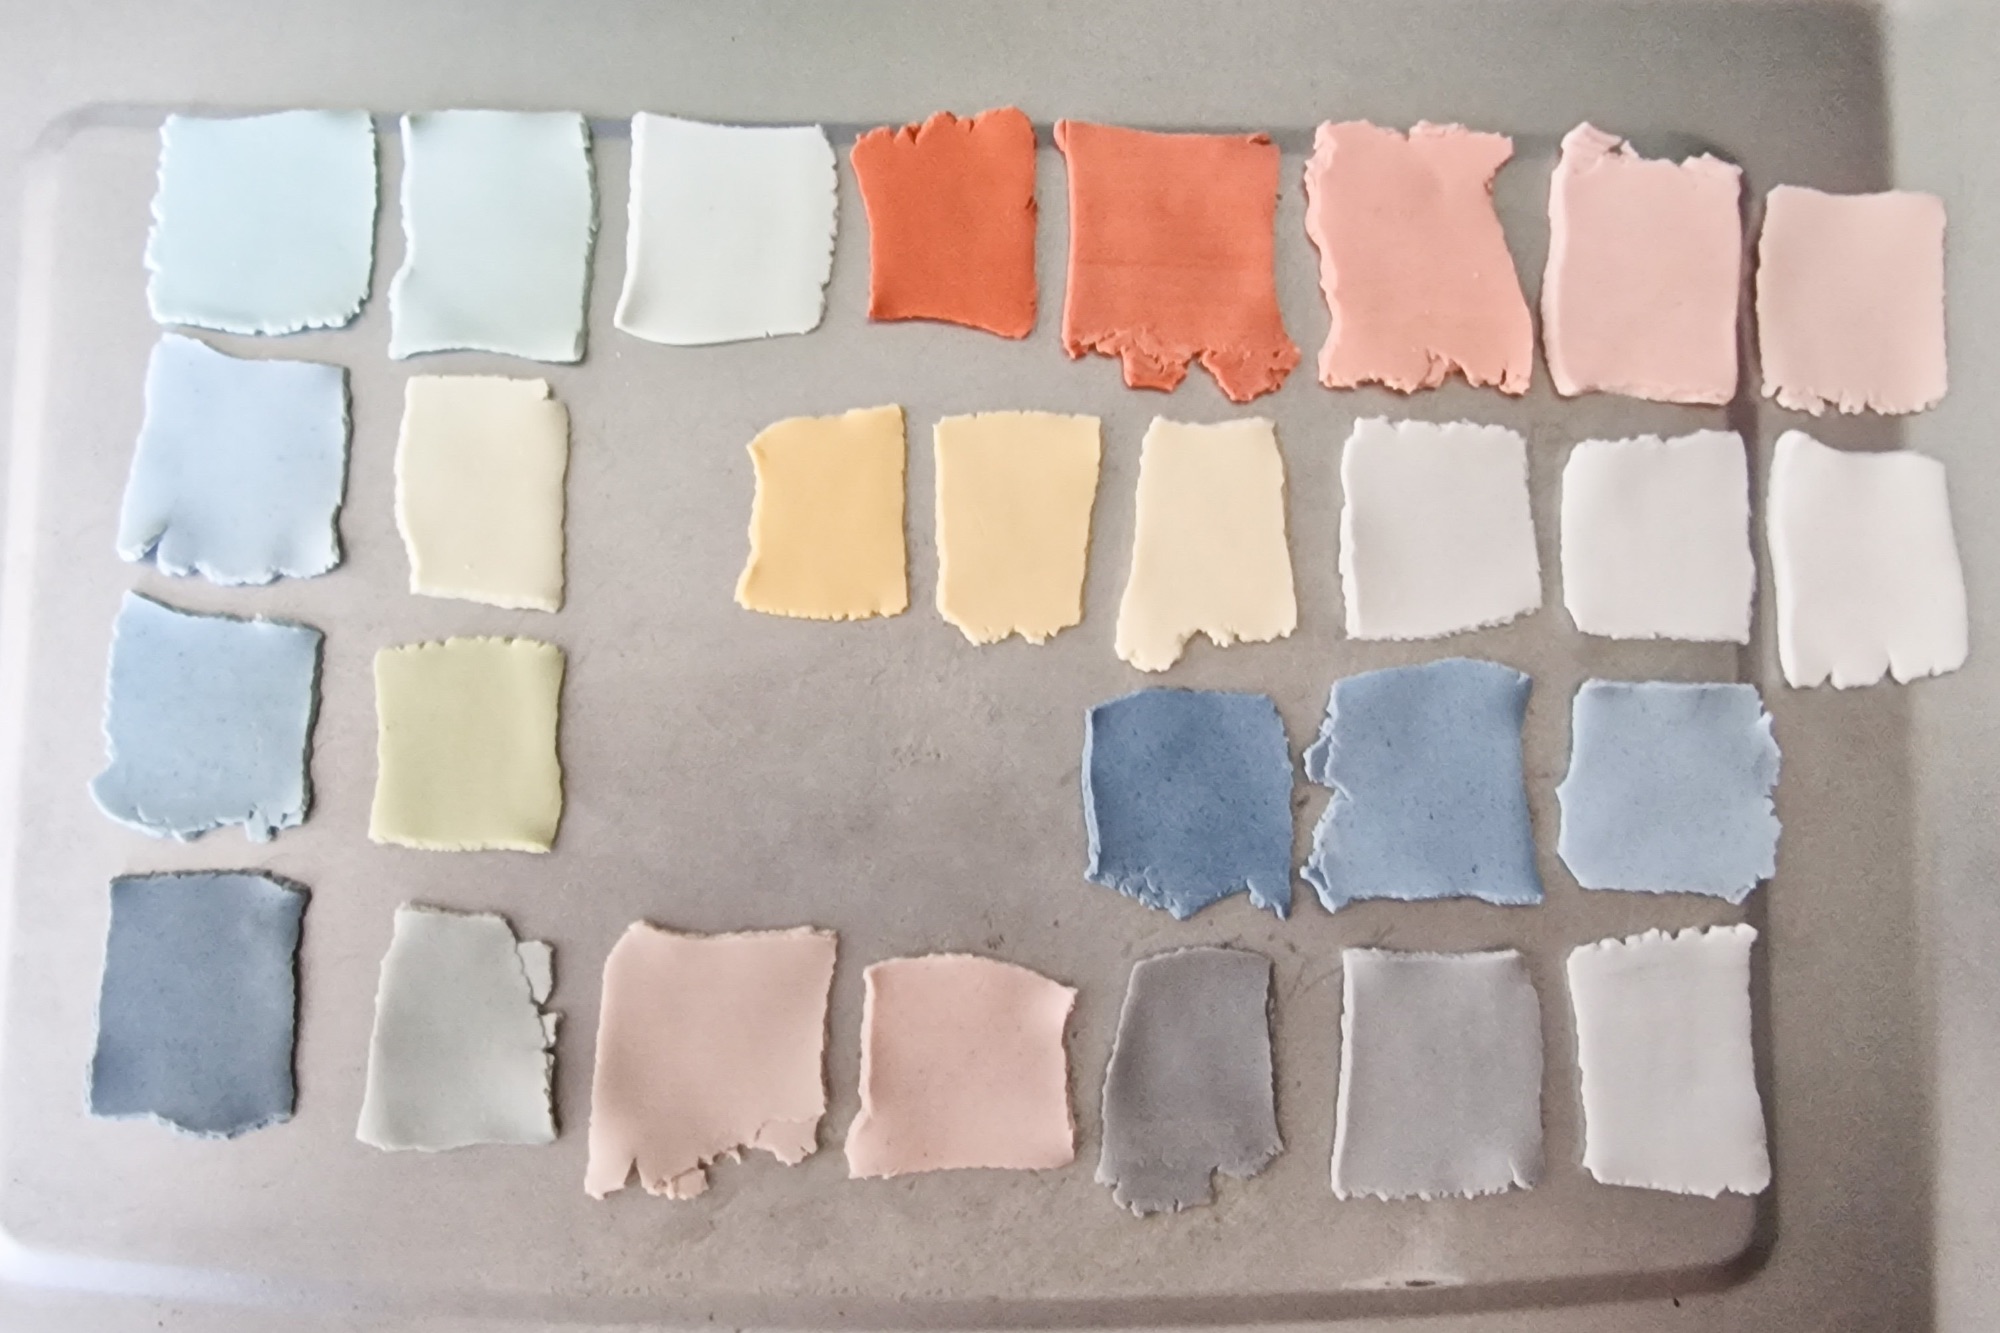
The very first time I used a dark cadmium red (deep crimson) I mixed at least four little spoonfuls of pigment into the clay as it just stayed a soft dusky pink colour. After baking, it came out a deep crimson - very similar to the actual pigment - so it's taken a fair bit of experimenting to learn how the pigments will change after firing them and how much pigment to use in order to get the colours I would like. Below are two photos showing the before firing on the left and after firing on the right and you can see how the pigments both darken and intensify in colour after baking.
Experiment and have fun creating your own colours
Using pigments with polymer clay to create your own colours won't be for everyone. It is time consuming and messy and polymer clay already comes in loads of different colours and finishes so why would anyone want to create their own colours!? I love it though and, as a colour obsessed colourist, one of the main joys I get from my work is the ability to create and make my own colours. I want my work to be different and one of the ways I can do that is to create all of my colours to my own requirements. Colour is joyful and it brings me a lot of happiness to make my own colours. I'm fascinated by pigments, what they're made from and how they behave and it gives me great pleasure to be able to play with pigments and use them like paint to create my own palette of colours. I'll write more about this as the creation of colour is the main focus and purpose of my jewellery. I use the resin clay in a similar way but that's a completely different material and a whole different colour game! More to come on that!
For now, I hope this has been interesting and has given you a little bit of an insight into how I use pigments with polymer clay. I'd love to know if you use pigments in your work and how you use them.

Colourist and jewellery designer maker living and working in Frome
Comments